Pages

Sunday, December 6, 2015

Gifts for Less!

Christmas gifts for Cheap! 

My nieces are very artistic and go through a ton of blank paper! So I decided to whip out my laminator and laminate a few "blank" pieces of paper they can use over and over again! Of course I wanted to get them started so I put these phrases on here. I also got them a Doodle Tin from Usborne Books and some dry erase markers from the dollar store to go with them! You could also pair them with some dry erase crayons (which work AWESOME!)

I'm in the process of making a jewelry drop tray for my other nieces. You can use thrift store plates, buy them new (The Dollar Tree is a great place to start--thats where I got the crystal ones. The floral ones are Pioneer Woman from Walmart. They are about $4.80 a piece there). I'll prob paint the under side of the clear ones. Permanent paint pens, spray paint, acylic paint?

The candle holders that separate the plates are from a thrift store. And I'll be using E6000 glue to adhere them to the plates!
I haven't decided on the arrangement of the plates yet.
Another idea is to use those silver trays from the Dollar Tree. 

Thursday, June 11, 2015

Baby Headbands

I went to find a cute headband for our newborn baby girl and realized that the ones I made for the last baby had gone through alot& seen better days. So I decided to make some more! Here are the final pictures. Ill be posting tutorials soon!


These are super easy and don't really need a tutorial but ya. I buy the knee highs at Walmart that come in those little plastic balls that look like toy machine balls. They are under $1 and I can make quite a few newborn headbands out of just 1. These shown here you just cut the toe part& top part off the knee high and just tie the ends together and you're done. Of course wrapping around babies head to measure how big you need it, allowing room to tie it. You can cut the knee high length wise also to make them "stretch" further.


Wednesday, April 15, 2015

Visiting Teaching Calling Cards


As always these are for PERSONAL USE ONLY and not for resale or profit. 
If you share this printable please have it linked back to this post. 
Thank you!


7 Free Frozen Potty Progress Chart Printables!


Recently I did a Frozen Potty Progress Chart for my 3 yr old.
(click on link or picture below to print it)

It was only for 1 sticker a day if she had no accidents. 
This works OK but she needed a little more to show for it so I created this chart to go with it so she gets a sticker every time she goes! 
Then if she's dry all day she gets one on her other chart too! We will see if this works better for her!

As always please respect that these printbales are created for PERSONAL USE ONLY. Please do not use these for commercial use or resale. Please do not take credit for my work. If you would like to share them on your blog or other media please link back to this post so I can get appropriate credit for the work.  I have used clipart from disneyclips.com and I would like to give special credit to them for all the clipart.

Free Printable!
Frozen Potty Progress Charts
(I went a little crazy with the charts! Enjoy!)


 I included a "boy" version too! I have 4 girls so I sometimes forget about those sweet little boys out there!:)


Tuesday, April 14, 2015

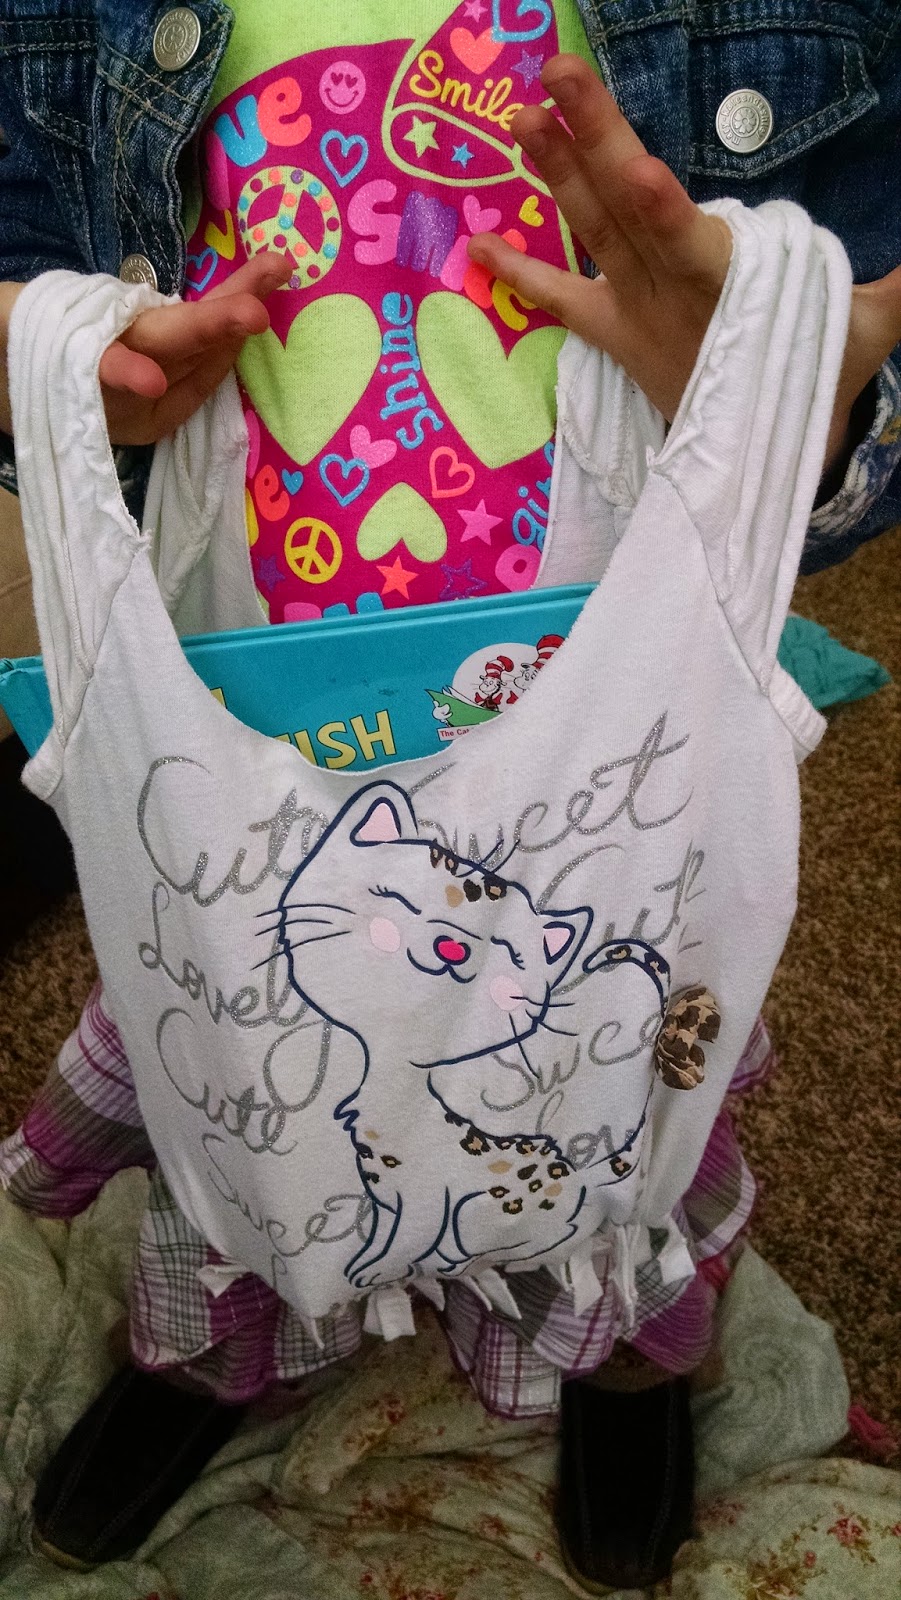
T-shirt Upcycle


This is such an easy,quick project!
It took me maybe 10 mins. 
I just cut the sleeves and collar off and cut strips on the end and braided/tied the strips together. On the white one I kept the sleeves because they were cute:) 
I used size 12mon for the butterfly one and size 4t for the cat one. And of course they were ones that were stained or something from my recycle box so no cost to me!:) 


Super easy and just right for my little girls!


Pikle copy cat cover

 So have you seen those cool In A Pikle bag things lately? They are super cool! But the cases are just not in my price range :S
I wanted to give a couple as gifts for Christmas so here's what I did.
I bought the pouch inserts and made my own cases! They now have a larger one I'd like to make as well for myself. I've seen where people have made similar things and used zip lock bags and just sewed them in the center. I did that with my test one only I still used the snaps to snap the bags in. I sewed several bags together then cut a hole where the snaps are. It works fine but just didn't look as nice. And the bags aren't as durable. I also thought of using clear zipper pouches and just punching holes in them which would work too. I could even sew I line only both sides of the holes so things don't slip out. I just haven't gathered enough pouches and its much cheaper to just buy the pikle inserts!
 Above: possible pouch option
Below: The Pikle inserts

 Above: My first version of the case (VERY rough!) I had the zip lock bags in there before but I forgot to take a picture!

Below: Another possible insert option for a bigger case

So here are my final, finished ones I did to fit the inserts. I didn't want much bulk and I put a little pocket on the outside,elastic on inside, found some stain remover pens at the dollar tree, put some band aids and such in there and wahla! Of course my idea wouldn't have been reality without my mothers sewing abilities so thanks mom for makingy vision a reality!
The inserts cost about $5 for 4 inserts so I got 2 sets and put 2 inserts in each which gives them at least 4 zipper pouches and I had leftovers to make one for myself :D


Anyway, I didn't sell these (and won't) but you could maybe do the same and have something custom to fit your needs! Enjoy!

Wednesday, March 25, 2015

FREE Frozen Potty Chart


 print this pdf!:)

All you need is this printable and some stickers or a marker! 
You could also laminate it or slip into a dust cover so you can reuse it for years to come!

This potty chart is for my 3 year old that knows HOW to go, but needs a little motivation.
You can use it in a few different ways. 
You can say once it's filled they get one big prize (I'm doing gymnastic lessons as a "prize" because that's what she really wants and she needs to be potty trained completely to go!). 
OR you could say after each week or day of being dry they get a sticker and a small prize like a candy or special prize. 
OR you can give a sticker for each day they go at least once in the potty (for beginners). 
OR really however you want!:)
Like I said, I made it for my older daughter who had to go all day without accidents to get a sticker and at the bottom she gets bonus stickers for being dry at night. I'll prob. make a different chart for night time training once she gets better at listening to her body in the day time. 

This printable was made for personal use only. Please do not copy or print any part of this printable for commercial sale or use! I love to share my printable's with everyone,but if you post on your blog, etc. please just make sure there is a link back to this post/blog. Thank you! You guys are awesome!

If you have any suggestions please feel free to comment and share below! 

Thursday, February 26, 2015

Tulle Hair Bow

My daughter wanted a hair bow just like the one on her dress. It just so happened I had the perfect purple Tulle I picked up on clearance a few years ago. And the button in the middle grandma just happened to have one from a sweater just like the one on her dress! You could just use a glue on rhinestone, but I wanted to get as close as I could.
I just rolled the Tulle in a long strip, the folded the raw ends in. You could glue it, but I just wrapped it with purple string in the center, then later I hand sewed the clip on which secured it more. Then hand sewed the button on. I don't much like to use glue with Tulle because I always burn myself or something.
Anyway, I think it turned out super cute!

Materials needed:
*Tulle--apx 12" x 20"
*Buttons, ribbon or other embellishments for center
*Hair Clip of choice
*Thread
*Needle
(Or hot glue if you choose to glue instead of sew)
*Scissors


Roll Tulle keeping raw edge in center at end
Then fold raw edges into center like below 


Sew or glue center together while pinched.
Sew or glue on clip to back and sew or glue on embellishment in center!