Sunday, March 9, 2014

Frozen Birthday Party (On a Budget)

My 4 year old daughter LOVES the new Disney movie Frozen! But spending $100 on a cake and decorations, etc was NOT an option! So I set out to find inspiration on Pinterest! 
I found some great Pins but the one that I used the most was this post:
http://bubblynaturecreations.com/2013/12/disney-frozen-party.html
It has the recipe for the sugar crystals and the inspiration for my cake but I did mine very differently. 


I used 2 white cake mixes. 
I dyed 1 mix purple (used food coloring) and put it into a rectangle 13x9 glass casserole dish. Make sure you grease and flour the pans good or they will stick& fall out in pieces like mine did! Learn from my mistake! If it does get messed up you can piece it together& cover it all up later!
The next 2 layers were made with 2 round pans. (you can use two 8in or 9in round pans) I used one white cake mix and split it into 2 pans. Pour half into 1 pan then color what's left in your mixing bowl with 3-5 drops of blue food coloring, stir, and put into other round pan. Bake all cakes according to instructions making sure you grease& flour good!

Let cakes cool a little then flip over out of pans. I put my 13x9 one right onto a big cookie sheet with foil (the one i was building the cake on) and the 2 round ones on a cooling rack or plate.While they continue to cool put a piece of bread on top each so they don't dry out! This totally works trust me!

I put a blue swirl in this one. I cut out a circle out of the middle for the top layer but you can leave it big too. My 2 year old got into mine and ate around the whole outside anyway so I had to improvise! 

Put your cakes in the fridge until your ready to assemble your cake. You can stack them then put into fridge if you want to. 

I did marshmallow fondant on my whole thing. I used this post to make mine:
http://www.momsandmunchkins.ca/2013/11/10/marshmallow-fondant-recipe/
I had plenty to make all the figures and cover the cake with extra to spare! If you buy the figurines you will obviously have lots to spare! (I couldn't find any here at last min but you can prob find the Frozen Busy Book online or at Walmart with all the figures!) 
Here are the marshmallow fondant figures i made. I just googled pictures of them and did my best!
"Marshmallow"- I used toothpicks to hold him together and some small sugar crystal pieces for the teeth and such.

Olaf is made of fondant too put together with toothpicks. I used food coloring to make the different colors. Brown was the trickiest. Just add all the colors together until it comes out right. The carrots of course dye accordingly 
If you can't find them you can find tons of free Frozen Clipart here:
http://www.disneyclips.com/imagesnewb5/frozen.html
Or printable Elsa& Anna that stand up here: 
http://spoonful.com/printables/elsa-papercraft

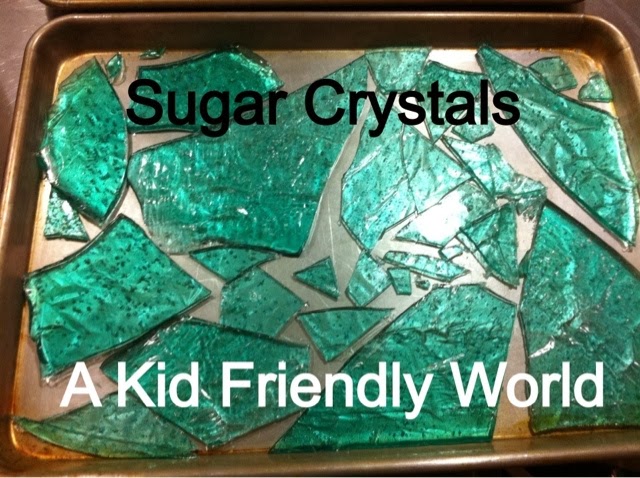
So I also made sugar crystals to make the castle. I used blue food coloring to dye the sugar. 
I put mine on sprayed, crinkled foil to give the crystals that "cracked" look. I also added silver& blue sprinkles but it didn't really sparkle like I wanted it to so kind of pointless. 

Find instructions to make the sugar crystals here:
http://bubblynaturecreations.com/2013/12/disney-frozen-cake-ice-cream-cake.html

And you can see how I put it all together here: 
I just stuck the pictures onto the crystals. It was plenty sticky.
Now just roll out a bunch of the white fondant until its bigger than your cake, lay it over, smooth it to the cake and decorate!
I also did other cute snacks& decorations!

Now, for decorations& other snacks!
I made some signs (ill attach printable soon), got the silver trays at the Dollar Tree for $1 a piece, got the poster for $5 and put it in a poster frame I had on hand, filled some large vases (found at walmart& from garage sales) with Silver, blue& purple ornaments I had on hand. You can find them on clearance after Christmas or use ones you have on hand or ask a friend. I framed a few clip arts from the disneyclips.com I shared above,  and the blue tub has party favors in it. The tub & bags& favors all came from The Dollar Tree. You can also find things at Walmart & on amazon.com
You can find printable banners on Pinterest or find cheap ones at the Dollar store or Walmart. Me& my mother actually made this one out of fabric so we could reuse it over& over again!
Just use your Cricut or Silhouette machine to cut out the letters and iron them on using heat n bond. We used binding for the ties and just cut out triangles using a templet made from cardboard. Easy! 

I cut out some snowflakes and made some 4D ones too (instructions found here:) 
http://trends4everyone.blogspot.com/2013/11/diy-and-crafts-ideas_9571.html?m=1


I used purple plates & teal napkins (Walmart) & served blueberry/strawberry jello and some extra sugar crystals. 

Water bottles with cute "Melted Olaf" labels on them! ( ill post printables soon)

Purple or blue punch- I used sprite with huckleberry ice cream but you could also put blue food coloring in sprite and add vanilla ice cream. Or you could had blue Hawaiian punch or blue koolaid, pineapple juice and sprite with frozen blue punch/koolaid ice cubes!


Add a few balloons and streamers and you have a great party any Frozen fan will love! 

You can take it a step further and make 
rock candy:http://www.sciencebob.com/experiments/rockcandy.php

Or other ideas: http://catchmyparty.com/parties/disneys-frozen

coloring pages: 224f04a20f7fddb420cf8c6e12095f60
Or google

crowns or antlers: http://www.sisterssuitcaseblog.com/2014/01/frozen-elsa-crown-sven-reindeer-antler.html?m=1

Just check google & Pinterest and go crazy!:) 

Saturday, February 15, 2014

Meatloaf Recipe


My horribly written recipe haha
Everything you'll need:
1 lb hamburger (or turkey burger)
1/2 cup milk
1 egg
Salt& pepper
Garlic salt-to taste
Cheese- I used shredded Colby Jack
1/2 cup? Italian bread crumbs 
1/2-1 cup quick oats

Topping/Sauce-
1/2 cup brown sugar
1/2 cup ketchup 
(I usually double because I like lots of sauce!)
Whisk together and set aside:)

Mix hamburger and all other ingredients together (except sauce--although you can add some ketchup to mix if it seems too dry. Or more milk or eggs). 

Put into casserole dish--average size is best but you can use a smaller one and half the recipe like i did (or leave the same for thicker) or put in 13x9 pan. Just keep an eye on it. You'll know it's done when it shrinks up and is boiling and "browned". 

Cook time 1 hr @ 375 degrees fahrenheit  
Cook 30 mins then add sauce mixture and cook for 30 more mins! Enjoy!

Wednesday, February 12, 2014

Peach Lemonade


•1 can peaches-drained and blended
(You can also use fresh or frozen to make it extra yummy! I used a regular magic bullet cup to blend. The more peaches the better in my opinion!):)

•2qts of lemonade prepared according to directions

Stir the blended peaches with the lemonade and enjoy!:) 

Clearly I was craving it so much I drank half of it before I took pictures!:)

Friday, February 7, 2014

Extra Cheesy, Extra Yummy Mac&Cheese!


I made some super yummy Mac-n-cheese today! I just eyeballed it amd threw stuff in so I just guessed on the amounts! Here's what I used:

4-5oz Velveta Cheese Cubed
2-3oz Cream Cheese Cubed
1/2-1cup Shredded Colby Jack Cheese
1/2-2cups Milk (I used 2%-do 1/2 cup then see if you need more!)
Leftover Ham-bite size-optional
Could use chicken, bacon or no meat (so much better with it though! Cook it of course!)
2-3 cups (About half a box?) of cooked pasta of choice 
(I used mini rigatoni-aka mini bow tie pasta)

Melt all the "cheeses" and milk together in saucepan stirring constantly until its all melted. Add meat and pasta, stir& serve! 

WARNING THIS IS EXTREMELY CHEESY!!

Serving Size is about 4? It fed me, my husband and 2 toddlers. 

Wednesday, February 5, 2014

HOW TO TRACE ANY FILE/IMAGE

HOW TO TRACE AND IMAGE/FILE and SAVE IT as an SVG or whatever you want! I haven't tried putting the file onto the Silhouette software yet, but I'm assuming it would work! I LOVE this software! It's my new best friend! 
Just go to:
http://www.inkscape.org
This is the easiest, best program I've found for doing this and to make your own Subway art, flyers, business cards, fb banners, blog headers, etc! It's simply amazing and super simple! It's exactly how I wish all my other programs worked! You can go to the learn tab on their site and see how to do everything. Here's a video as well:)
<iframe allowfullscreen="" frameborder="0" height="270" src="//www.youtube.com/embed/0Ch9EbujPSs" width="480"></iframe>

Saturday, February 1, 2014

Homemade Italian Bread Crumbs

HOMEMADE ITALIAN BREAD CRUMBS


So good& so easy!
Ingredients:
• 1 cup bread crumbs 
• 1 TBSP Butter
• 1 TBSP Italian Seasoning

(I did a whole loaf of bread which was about 9 cups so I did 3 cups at a time)


I used frozen bread and put in food processor then in blender to make sure all chunks were broken down fine.


Then just melt butter in pan, put in bread crumbs and Italian seasoning and fry/stir until bread is dry and crumbly. 

Then put on cookie sheet lined with foil and let cool/dry. (I used foil so I could just pick it up and dump it in bags) 


When cool, put crumbs into a freezer bag,label and put in freezer until you need to use them! 


Note: You can also use a recycled container, the bread bag you took the bread outof or Tupperware container to store them in freezer.
Can store for 6+ months in freezer! 

Monday, January 27, 2014

Lemon Breaded Chicken

Made some amazing lemon breaded chicken tonight! I used Mrs. Dash seasoning that had lemon in it instead of lemon zest though;) I also fried up some sweet potatoes and whipped up some Chicken Pasta Roni and frozen mixed veggies. SUPER easy! In fact I just defrosted the chicken right out of the freezer!
See recipe here: http://damndelicious.net/2014/01/22/easy-lemon-chicken/

Wednesday, January 22, 2014

New Site!

Just wanted to share an awesome new site I discovered!! They have awesome electronics, bed & bath stuff, clothes, jewelry, etc.! They have awesome daily deals and about every other day they run free shipping! And not only that, they have an AWESOME referral program! If you refer someone THEY get $10 credit PLUS YOU get $10 credit! YA! And they have TONS of things at, under, or around $10 so just use your credit when they have free shipping and you could get alot of stuff free! I've already gotten $20 off and scored a Android tablet and some headphones for a STEAL! I could have just gotten some free stuff, but I wanted to get some bigger items so I just got even BETTER deals instead of completely free. But that was completely my choice:)
Now, here's how it works! You can't get credit unless you use my referral link: 
http://vnlink.co/SfcacQc

It's called www.nomorerack.com

and your credit only lasts so long so be sure and look under your credits to see when it expires so you don't miss out! At this very moment they are running a free shipping for the next 3 hours and they do this quite frequently! So hurry! What are you waiting for!!:) 

Wednesday, December 25, 2013

Canning Jar Trick

You know when you take out that amazing jar of jam or other delicious canned item and then put the ring with the lid back on and the next time you get it out it sticks to the jar and you have to try and pry it off!? Yaaaa, not my favorite thing either! I always make a big mess!:p 
Well, my mother in-law shared a great tip to keep the lid from sticking/sealing shut!
 
It's as simple as flipping the lid upside down! 

Now why didn't I think of that!? 
When I took her jam out to use it I just thought someone made a mistake, but was informed that is was a brilliant way to save me a LOT of cursing because I flipped jam all over! (Admit it! You've done it before!) :) 

So there you have it! Flip the lid once you've opened your canned items and save yourself some frustration!:)


Monday, December 2, 2013

Indoor hop scotch!


Our winter bored buster! Masking tape or painters tape on the carpet or floor to make hop scotch indoors!


Thanksgiving

Thought I'd share a little Thanksgiving yumminess! 

All we do for our turkey is mix softened butter (I used 3 sticks but 2 is plenty) and mix in spices with your butter like salt, pepper, garlic powder, sage, rosemary and whatever else you feel like. Then just grab a handful and shove under the skin of the turkey and on top. Then shove into a turkey bag and follow bag instructions.
We used a large electric crockpot type thing to bake our turkey which only take like 2.5-3 hrs to cook! 
Then add 1/4 cup flour to each cup of turkey broth and you have a yummy gravy! 
My bro and sis in-law brought the BEST green bean  casserole EVER too!

We had some family over and just enjoyed some yummy food and great company!

I'd love to see what yummy things you made this year!

Wednesday, November 6, 2013

Loaded Potato Soup

So I have a craving for some potatoe soup so I whipped this recipe up!
Only I did things a little differently according to what I had on hand. I will put my ingredients then the original recipe following with the instructions. 

4-5 small potatoes peeled and sliced
2-4 carrots sliced 
2 handfuls of cheese (and some for top if you want)
1 lb bacon chopped
1/2 an Onion or minced or onion powder (I used a sprinkle of onion powder)
2 cups heavy cream (or you can add 1 cup cream and 1/2 cup sour cream with a 1/4 of milk like I used)
1 can (1-2 cups) chicken or veggie stock (I used 1 can chicken broth)
1/4 cup or a little less? flour. I just sprinkled the 1/4 cup until it looked about right.
And chopped celery ( i used a sprinkle of celery seed)
Some salt& pepper to taste

And if you want to be "sneaky" you can put cauliflower or squash purée (i used 1 jar squash baby food)!

I added a little bit of left over chopped up grilled chicken breast to the mix too.

Here's my picture:

Loaded Baked Potato Soup from Carnation Café at Disneyland Park

Here's where I got the above picture and following recipe:

http://disneyparks.disney.go.com/blog/2012/01/carnation-cafe-closes-thursday-for-renovations-at-disneyland-park/

Loaded Baked Potato Soup

Serves 6

1 pound bacon, roughly chopped
1 medium yellow onion, diced
1 large carrot, peeled and diced
3/4 cup diced celery
4 large Russet potatoes, peeled and diced
4 medium red potatoes, diced
1/4 cup flour
2 cups chicken or vegetable stock
Coarse salt, freshly ground pepper, to taste
4 cups heavy whipping cream
Optional garnishes: chopped chives, bacon bits, sour cream, shredded cheddar and Monterey Jack cheese

  1. In a 6- to 8-quart stockpot over medium heat, fry bacon until crisp.
  2. Remove bacon and drain on paper towels, reserving half for garnish. In bacon fat, cook onions, carrots, and celery until the onions are translucent. Add potatoes and cook for 4 minutes, stirring occasionally.
  3. Whisk in flour and stir constantly over low heat until the flour is cooked and the mixture has thickened slightly, about 5 to 7 minutes. Add chicken stock and half of the bacon. Season with salt and pepper.
  4. Over medium-high heat, bring the soup to a simmer and cook for 25 minutes or until the potatoes are soft. Mash some of the potatoes for thicker, creamier texture. Add whipping cream and simmer for 5 minutes.
  5. Adjust thickness by adding water or stock. Soup should have a creamy consistency.
  6. Season to taste, and garnish with toppings.

Cooks’ notes: Soak diced potatoes in cold water until ready to use to keep them from turning brown. To make bacon easier to chop, lightly freeze.

So you could do exactly like she did only add some puréed veggies to the mix or whatever else you desire:) 

Let me know how yours turns out!

Enjoy!

Tuesday, November 5, 2013

Odd recipes that will change your life!

So these might seem like very weird recipes but I must tell you that my whole family is very picky (including myself) and these are both AMAZING! Not to mention EASY! 

So the first is a new one for me and its kind of a "sneaky chef" kind of recipe! I NEVER thought I'd put VEGETABLES in my hot cocoa but guess what! I did! And it was awesome! Lets just say both my girls wanted a second cup too! Ya! 
So I got this recipe from this book:

And here is the "secret" recipe:

So guess what I did for the sweetpotato  puree!? I used BABY FOOD:) (Shocking pause here) Yep! After all, Sweet Potato baby food is just puréed veggies! And I used pumpkin spice and ya, lets just say it tasted like chocolate chip pumpkin spice cookies in liquid form. If you can imagine that. :)

So here's another mind blower some of you may have heard about.

It's just 3 ingredients:
1 jar/bottle of chili sauce
1 jar of purple grape jelly (small one)
1 bag of frozen meatballs

Throw all in a pot on the stove until soft or for Sundays throw in the crock pot on low for 2-3 hrs:) 
These might look nasty but they are a mouthful of goodness!
I guess you could be sneaky by adding some puréed veggies to this recipe as well! If you try it tell me what you think!

So has your mind been blow yet!? It should have! I'll be posting some more yummy stuff soon! 

Monday, October 21, 2013

Silhouette Money Saver

I thought I'd share a few tips, tricks& how to's about how to use your Silhouette Cameo! You can save a LOT by making your own stencils, fabric appliqués, cards, vinyl quotes, etc. 


Here are a few basics to start with-
Silhouette Blog:

Free Shape of the Week (main silhouette website)

From there u can find the shape of the week, go to the online digital download store, get ideas& see new items!
Want to save a LOT of money on dingbats, fonts& shapes? 

How to find shapes (otherwise known as dingbats), fonts &SVG files for free:
You can simply search google by using key words like :
Free SVG files
Free Dingbats
and
Free Fonts
You can also search Pinterest
(Here's my Silhouette Cameo Board you can follow: 

You can also find free ones at the following websires&blogs:
SVG Files:


Using SVG files with your Silhouette:
Dingbats&Fonts:


Here are some other great resources for saving money!
This one talks about the Cricut machine but I found some of the tips& tricks applied to my silhouette as well:

Here's a whole list of tutorials for your Silhouette:

Here's how to cut fabric. It uses the Cricut but the process is the same. 

Here's the same process for the Silhouette:
Here's a YouTube video as well:

Keep in mind YouTube is also a great resource to search how to videos on how to do just about anything on your silhouette. I know the Silhouette website has videos too.

Here's how to cut vinyl with your Silhouette:
Video-
Blog Tutorials:
Without mat-

Extra large vinyl cuts-
With Silhouette vinyl kit-

Again just search and ye shall find!:)

How to make a stencil with your silhouette:
I've seen several ways to do this. 
You can either cut out your stencil using card 
stock or one time use ones by cutting out vinyl. Or 
you can use clear binder covers. 
The binder covers will keep their shape and 
last a little longer. It's also better for those big projects
that require you to tape up your stencil.

Here is a tutorial here on making the binder cover ones:
HOW TO TRACE AND IMAGE/FILE and SAVE IT as an SVG or whatever you want! I haven't tried putting the file onto the Silhouette software yet, but I'm assuming it would work! 
Just go to:
http://www.inkscape.org
This is the easiest, best program I've found for doing this and to make your own Subway art, flyers, business cards, fb banners, blog headers, etc! It's simply amazing and super simple! It's exactly how I wish all my other programs worked! You can go to the learn tab on their site and see how to do everything. Here's a video as well:)
<iframe allowfullscreen="" frameborder="0" height="270" src="//www.youtube.com/embed/0Ch9EbujPSs" width="480"></iframe>

Thursday, October 17, 2013

Coffee Filter Flowers

We had a huge package of coffee filters for some reason? We don't even drink coffee so it must have been for some craft or something. Anyway, my daughters love to play with them for some reason so I thought we could actually make something with them instead of just having them making a mess all over the house. 
Alli actually first said,"Look mom i made a flower." And sure enough she had! That's what made me think of the old craft of making coffee filter flowers! I looked up on Pinterest how to dye them but I had already figured it out before I looked so I didn't really use a particular pin/post. 

It's very simple:
What you'll need-
•Large coffee filters
•Food coloring
•Water
•Cookie Sheet to let flowers dry on
You can also choose to use floral tape and stems to make them look real but we didn't. 

Instructions:
Fill a bowl about half way full (or less it doesn't take much)
Drop in food coloring according to the egg dying instructions. Or just eyeball it! Get out cookie sheet and set everything aside. You can do this after making the flowers too makes no difference. :)
To make the flowers you just:
1. Fold filter in half
2. Roll filter loosely until it forms a flower
3. Twist the end (towards the flap/opening to make them fuller)
Then to dye them just dip the very tips of the flowers in the dye/water solution and tip up to allow dye to seep down to stem and on "peddles". You can also use a spoon and drip it on the flowers. If your child dips the whole thing don't worry it will just take longer to dry. You can squeeze some of the excess out to help as well. Then just set them on the tray, foil, plate or whatever you're using for them to dry on. Metal is best so it doesn't stain though. 
Anyway, just dip and let dry. If you can, put them on the tray upside down so the dye drips to the tips of the peddles. It took all night for ours to dry but my daughter soaked hers. Once they dry you can add stems or do whatever you want!
We had a green bowl, a red bowl& a purple bowl. The purple had alot of blue so it made a cool tie dye affect. The red makes a pink flower unless u have a LOT of red food coloring! And we dipped some in both purple& green mixtures to add even more color. I think they turned out GREAT!


HAVE FUN!!

Wednesday, October 16, 2013

Frozen Chicken Genius

We are all about saving a buck at our place! Which means we wait until meat is at it's lowest and then stock up! We recently stocked up on Chicken Breasts. We usually buy from the butcher counter because its not only fresher but it is usually cheaper than the frozen or pre packaged kind. You can get it wrapped in whatever weight increment you want but my husband has come up with a GENIUS idea to make freezing, storing& thawing a LOT easier! It's so genius I had to share! 
It's simple:
Wrap each piece of chicken in plastic wrap (we used a high quality restaurant plastic wrap from Sam's Club but not sure if it has to be the high temp/low temp tolerant kind or not? try and see!) then layer into a gallon bag! 
We butterfly and cut off the fat before doing this, but you don't have to. This process also makes portioning into 10 different bags a thing of the past! And it saves $ on gallon bags because you can throw them all into one bag and then just pop however many you need out of the bag! And sense they're individually wrapped I don't see why you couldn't reuse the gallon bag too saving even more $!
The plastic wrap also seems to keep the chicken fresher and doesn't get freezer burn as easily. Win all around!