Monday, December 22, 2014

REVIEW--KISSMEmommy Prenatal Vitam

Review--
KISSMEMommy Prenatal Vitamins


So I've been using these prenatal vitamins for about a few weeks now and I have to say they are pretty great!
They have all the basic vitamins you need for you and baby+ my nails and hair have never looked better!
I honestly feel less sick when I take them which is awesome!
They don't have a nasty taste to them,which is always appreciated, and they are PINK! How fun is that!


So here are the specks on them:

"Who Else Wants to Glow? The Secret to Beautiful Hair, Skin and Nails
No longer alone inside your body? If you're not consuming the necessary vitamins and minerals, what you do take in is diverted to your growing baby, depleting your energy and causing stress on your appearance. KISSMEmommy PRENATAL ensures that no unnecessary sacrifices are being made, promising both you AND baby are nourished. 

  • SMALL CAPSULES for sensitive palates
    NO OVERPOWERING ODOR to cause stomach upset
    NO FALSE CLAIMS about ingredients or sourcing
    Contains ALL THE ESSENTIAL VITAMINS AND MINERALS for a healthy pregnancy
    Acts as a Women's Vitamin to IMPROVE THE APPEARANCE OF HAIR, SKIN AND NAILS

-Folic Acid helps prevent defects of the brain & spinal cord 
-Vitamins B-12 & B-6 combat morning sickness! 
-Calcium protects bone density for mommy while baby's bones are growing 
-Zinc is essential for the production, repair and function of DNA! 
-Iron helps you & baby's blood carry oxygen 
-Vitamin D reduces the risk of complications, including gestational diabetes, preterm birth & infection 
-Vitamin C bolsters the immune system 
-Thiamine (Vitamin B-1) aids in baby's brain development, as well as the normal function of the nervous system, muscles & heart 
-Riboflavin (Vitamin B-2) is essential for baby's growth, vision, healthy skin, plus bone, muscle & nerve development 
-Niacin (Vitamin B-3) is needed for baby's brain development, ensuring general health & emotional stability 
-Vitamin E (an antioxidant) is required for the proper function of many organs 
-Vitamin A supports embryonic growth!

Not Pregnant? You Can Still Glow!
The Best Women's Vitamin for Your Appearance
-Folic Acid is proven to promote hair growth and overall health 
-Vitamins B-6, B-12 and Zinc strengthen nails and improve shine - bye bye, brittle nails! 
-Vitamins C and E improve skin quality, giving you the confidence you deserve
We Offer a 100% RISK FREE No Questions Asked Money Back Guarantee"

Here's where to buy them:
AMAZON

5 Stars from this expecting mom!!
*****

Thursday, December 11, 2014

$1 Lid Organizer

So I discovered this clever trick quite on accident actually. I was putting away my lids and my cooling rack got put away in the wrong place. I set my lids in the cabinet on top of the rack and my brain sparked!
I set them between the slats and wahla! The PERFECT, CHEAP organizer for my lids was born! 


See, I had one, but it was too tall for my cabinets and it made it hard to get the lids in and out. Plus, all my small lids got lost and forgotten or were just too small to fit! Now every style and size fits perfectly and they are easy to find and grab. And yes, they all stay up great! Even the heavy ones! 

But the key is finding the right cooling rack! Guess where I got mine! Yep, The Dollar Tree! They come in a 2 pack! Score!

Its even great for Tupperware Lids!I bet you could even use it for casserole dishes and other pans...hmmm...

So there you have it! The life hack of the week. 

The $1 Lid Organizer that fits any shelf!

Saturday, December 6, 2014

Free! Maze Generator!

I discovered this cool new site! 

It generates custom mazes for instant download in PDF form! Free! So easy!
This will be my secret weapon when working on my maze quiet book pages!;)
It even has a page that shows it solved.

Enjoy!

Friday, December 5, 2014

REVIEW-Smart Weigh TOP2KG Digital Pro Pocket Scale

Smart Weigh TOP2KG Digital Pro Pocket Scale with Tare, Hold and PCS Functions 2000 x 0.1g 

Review


This little pocket scale packs a huge punch! It has tons of features and at first I was sceptical that it would preform as good as a bigger scale, but I was pleasantly surprised! I actually liked that it was smaller! It takes up a lot less space and would be easy to bring with me if I wanted to. "Pocket" size is pretty accurate. Its only 6.5" in the box! And only 5" out of the box!


 And guess what else is included! Ya! Batteries! Shocker right!
Now, I do have to say it would be nice to have an alternative power source, but then again it saves electricity and makes it truly portable this way. Plus, its not something I use every single day so its actually nice to not have to fight with cords!
 It only takes up a small amount of space in my kitchen drawer+*****! 
This is a huge deal to me! I hate having to store my "extra" cooking tools on top my cabinets because there's not room anywhere else! One less thing I need the step stool for.
So what do I use this little thing for you ask?
Well, you know when your making rice krispies and it calls for 10 Oz's of marshmallows and you have a 16oz bag?! I'm always having to guess! Now I dont have to! Just whip this little firecracker out and bam! 
  It's also fantastic for other uses outside of the kitchen. Such as weighing things for shipping or packaging. It is small, so it does have limits, but it also has 2 covers you can put on it to help expand the weighing surface.
How about for making soap? Or candles? How about for making that perfect burger every time! Mmmmm yes!
Or for making sure you have just the right amount of fruit for that new recipe.
 It also has many different units to choose from (ounces,grams,and about 10 other fancy options I have no idea how to use!) 
And do you see this display! Its bold and bright! You can actually SEE it unlike some ive used!

 And for those crafter's and small business owners out there this is perfect for figuring out how many ounces or grams are in the packages your selling. It also has a cool counting feature, which I don't fully understand, but sounds cool. Basically it counts how many items are on there (I think?:/)
Anyway, long story short, this little scale is awesome! And whether you're looking for a unique gift for that "foodie" you know or that crafty autrapanuer out there look no further! 
Oh ya! Did I mention how fast the shipping is!? And that you can order it on Amazon!?
Ya, sweet! Just click HERE or click on the picture below to snag your own!
I received one or more of the products mentioned above for free using Tomoson.com. Regardless, I only recommend products or services I use personally and believe will be good for my readers.

Tuesday, December 2, 2014

Book Review--"My Favorite Animal: Dogs"

Book Review
of
"My Favorite Animal: Dogs"

As many of you might know I have 3 girls. Ages 4,3 and 1. My 1 year old LOVES dogs! She sees,hears or hear the word dog and her whole face lights up and she starts panting like a dog! So this was clearly her favorite book! 
My 2 oldest have been asking for a dog for awhile and this was great to teach them the basic facts about dogs.

I loved how after each section there are little quizes to help your child remember what you/they just read. It's never too early to start incorporating education!
The photos in the book were fantastic and everything was easy to read and understand. Not too long or too short.
The list price isn't too bad, quick& easy download.

Mom and kids happy=
5 stars!!
*****
I received one or more of the products mentioned above for free using Tomoson.com. Regardless, I only recommend products or services I use personally and believe will be good for my readers.

Sunday, November 23, 2014

FREE Pre-K Printable--Letter Y

FREE Pre-K Printable!!
Letter Y


Click picture above or click HERE to download/print!

T is for Turkey

A Thanksgiving Pre-K Activity Worksheet
FREE PRINTABLE


Click picture above or click HERE to download/print!

Life Hack of the Week--Ziplock Bag Trick

This idea was, surprisingly, from my 3 year old! She was messing around and put it on her zip lock bag of snacks. What she did was create a snack bag that stays open for the little ones (like my 1 year old) and makes it harder for them to dump all over the place! Simply brilliant!

Monday, November 10, 2014

JEWELRY FLASH SALE ON FACEBOOK

FLASH SALE on all my jewelry inventory going on NOW! SHARE with all! Trying to make room for new inventory!
Check it out:
https://m.facebook.com/Grizls/albums/653566114760617/?ref=bookmark

Here are a few screenshots for ya!


Wednesday, November 5, 2014

DIY Pumpkin Treat Bag


I love this time of year! Sweaters, apples, hay rides, pumpkin patches, fresh squash, colorful leaves, lightning storms,pumpkin carving, treat-or-treating,etc.
I'm more into the cute fall/autumn part rather than the scary part:) So when we go treat-or-treating we have cute bags & costumes instead of scary ones.
My Mother is the genius behind this bag! She made one for each of us as kids and now for my kids (her grandkids)! Mine has cute heart cheeks too so she made all my girls the same. So adorable! The pattern was from some random old book about 30 years ago and she's changed and adapted it into what it is here. I know I'm a little late posting this so you'll have tons of time to do yours for next year!

Here's the how to for these cute pumpkins!

Materials Needed:
--1/2 yard of outside fabric of choice 
(Usually orange but you can do any color or pattern your heart desires)

--1/2 yard of inside lining fabric 
 (I usually use black of some kind but I've also used orange. Totally your choice)

--1/2 yard of batting (any weight/thickness you want)

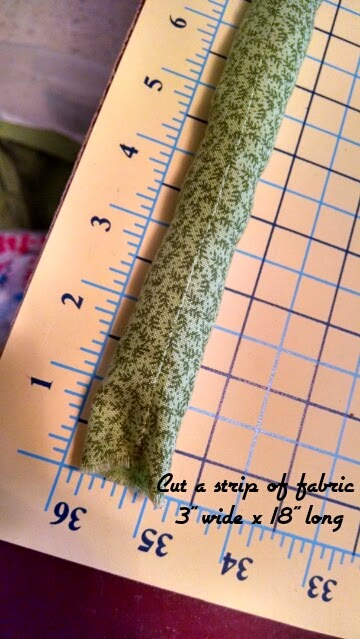
--Green (or color of choice) fabric strip 3" x 18"--used for handle--Could also use rope, ribbon,etc. But for this tutorial we made it.
Just fold long ways, right sides together, and sew along long edge, then turn right side out and stuff with stuffing.

---Small amount of stuffing

--square scrap for pumpkin stem in color of choice

--Stiff Interfacing. This is used for base circle & Lid. Its completely optional. Its used to help keep that pumpkin a little stiffer so it stands up better. 

--Spray adhesive optionial, but makes things easier when you go to sew everything together. Keeps the batting from slipping around.

--Sewing Scissors

--Pumpkin Pattern--Download
It HERE print it, cut pieces out. 
Some of the pieces go right up to the edge of the paper. Just round or go straight where needed.
Print the first page as a test page. If the 1 in square isn't 1 inch square when printed out, adjust your printer settings. Cut out as many pieces as it shows on the pattern piece.


Instructions:
I traced my pattern onto parchment paper so it would last for years to come. You can use white butcher paper or just the paper you print it on. Whatever you choose.


There are 2 face options included in this pattern. You only need to choose one to cut out. The "boy" one shown above has the face drawn on 2 pieces and the other "girl" one is on one piece and has cute little hearts. You will have 8 pieces of outside, 8 of inside lining and 8 of batting pieces (plus other pieces like the bottom,lid,and smaller pieces).So make sure you aren't cutting too many pieces!

Spray back of each orange piece with spray adhesive and stick the corresponding batting to it.

Here are a couple other options

Possibilities are endless on the face and pumpkin colors! You could do a Minecraft face on green fabric?! Or do a pink one with a cute face and a tutu on it. Whatever your creative mind comes up with!

 Draw your pumpkin face, in pencil, however and where ever you want. The possibilities are endless.
Or just use one of the 2 options provided in the pattern.
You will decorate and fill in the face part later. Doing the pencil marks now just help you to keep the pumpkin the right direction when sewing.


Keep going all the way around.


Pin the "bottom" outside piece to the bottom of the bag


Sew on the bottom

Turn right side out


Now do the same as you did for the "outside" orange pieces only for the inside.
Only this time you will sew them to the point. Right sides together like shown.

See, to the "point"

All the way around
Turn right side out and poke the seams so they are smooth.
Then turn inside out again.

Put orange (outside) part inside of the inside out black (inside) piece. Right sides together
Pen together around the rim and sew around edge
 LEAVING A WHOLE TO TURN RIGHT SIDE OUT WHEN DONE(about the length of one "panel"


Turn right side out


Hand sew where you turned the pumpkin right side out.
(you could also use the sewing machine and sew all the way around the rim if you want to)


Now work on all the outside pieces. (finishing touches)
You  could do these first if you wanted to. Makes no difference.
NOTE: There isn't a pattern for the handle. Just go by the measurements in the materials section or cut a piece of ribbon or rope how ever long you want it to be.


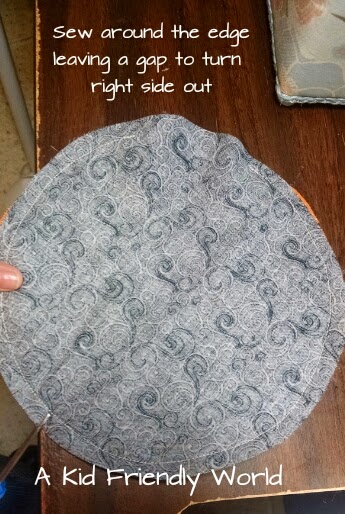
Put your lid together like shown
right side together again!

Sew around the edge of lid
 (LEAVING AN OPENING TO TURN RIGHT SIDE OUT)
Clip edges
Turn right side out
Fold opening in and iron to help keep shut when sewing shut.


Hand sew opening closed or sew all the way around rim.

Add ric-rac, lave plain, whatever.
Stem measurements in material section.
Again, just do it how you want.


 Embroider the pumpkin face you drew on at the beginning. You could also use markers, fabric paint, felt,etc to make the face.
 Sew on a cute button nose, draw the nose with marker, glue on a felt nose or leave it with no nose!

 All done!

I stuff ours with newspaper and put all over the house as decoration until Halloween night! Fall decor and treat bag all in one!

I'd LOVE to see your finished pumpkins! Please send me a picture of your pumpkin creations!

This pattern is not to be used for resale! It is for personal use ONLY! Please respect this!