
Sunday, November 23, 2014

T is for Turkey
A Thanksgiving Pre-K Activity Worksheet
FREE PRINTABLE

Click picture above or click HERE to download/print!
Life Hack of the Week--Ziplock Bag Trick

Monday, November 10, 2014
JEWELRY FLASH SALE ON FACEBOOK
FLASH SALE on all my jewelry inventory going on NOW! SHARE with all! Trying to make room for new inventory!
Check it out:
https://m.facebook.com/Grizls/albums/653566114760617/?ref=bookmark
Here are a few screenshots for ya!


Check it out:
https://m.facebook.com/Grizls/albums/653566114760617/?ref=bookmark
Here are a few screenshots for ya!
Wednesday, November 5, 2014
DIY Pumpkin Treat Bag

I love this time of year! Sweaters, apples, hay rides, pumpkin patches, fresh squash, colorful leaves, lightning storms,pumpkin carving, treat-or-treating,etc.
I'm more into the cute fall/autumn part rather than the scary part:) So when we go treat-or-treating we have cute bags & costumes instead of scary ones.

Here's the how to for these cute pumpkins!
Materials Needed:
--1/2 yard of outside fabric of choice
(Usually orange but you can do any color or pattern your heart desires)
--1/2 yard of inside lining fabric
(I usually use black of some kind but I've also used orange. Totally your choice)
--1/2 yard of batting (any weight/thickness you want)
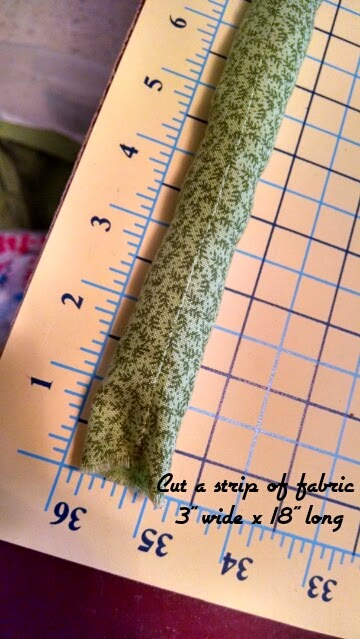
--Green (or color of choice) fabric strip 3" x 18"--used for handle--Could also use rope, ribbon,etc. But for this tutorial we made it.
Just fold long ways, right sides together, and sew along long edge, then turn right side out and stuff with stuffing.
---Small amount of stuffing
--square scrap for pumpkin stem in color of choice
--Stiff Interfacing. This is used for base circle & Lid. Its completely optional. Its used to help keep that pumpkin a little stiffer so it stands up better.
--Spray adhesive optionial, but makes things easier when you go to sew everything together. Keeps the batting from slipping around.
--Sewing Scissors
--Pumpkin Pattern--Download
It HERE print it, cut pieces out.
Some of the pieces go right up to the edge of the paper. Just round or go straight where needed.
Print the first page as a test page. If the 1 in square isn't 1 inch square when printed out, adjust your printer settings. Cut out as many pieces as it shows on the pattern piece.

Instructions:
--Pumpkin Pattern--Download
It HERE print it, cut pieces out.
Some of the pieces go right up to the edge of the paper. Just round or go straight where needed.
Print the first page as a test page. If the 1 in square isn't 1 inch square when printed out, adjust your printer settings. Cut out as many pieces as it shows on the pattern piece.
Instructions:

I traced my pattern onto parchment paper so it would last for years to come. You can use white butcher paper or just the paper you print it on. Whatever you choose.


There are 2 face options included in this pattern. You only need to choose one to cut out. The "boy" one shown above has the face drawn on 2 pieces and the other "girl" one is on one piece and has cute little hearts. You will have 8 pieces of outside, 8 of inside lining and 8 of batting pieces (plus other pieces like the bottom,lid,and smaller pieces).So make sure you aren't cutting too many pieces!

Spray back of each orange piece with spray adhesive and stick the corresponding batting to it.
Here are a couple other options


Possibilities are endless on the face and pumpkin colors! You could do a Minecraft face on green fabric?! Or do a pink one with a cute face and a tutu on it. Whatever your creative mind comes up with!
Or just use one of the 2 options provided in the pattern.


Sew on the bottom


Only this time you will sew them to the point. Right sides together like shown.


Then turn inside out again.


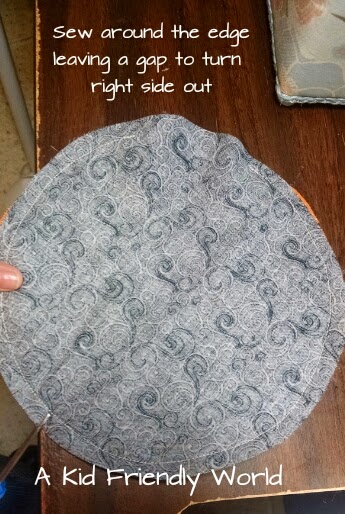
Pen together around the rim and sew around edge
LEAVING A WHOLE TO TURN RIGHT SIDE OUT WHEN DONE(about the length of one "panel"


(you could also use the sewing machine and sew all the way around the rim if you want to)


You could do these first if you wanted to. Makes no difference.
NOTE: There isn't a pattern for the handle. Just go by the measurements in the materials section or cut a piece of ribbon or rope how ever long you want it to be.


(LEAVING AN OPENING TO TURN RIGHT SIDE OUT)


Again, just do it how you want.


Embroider the pumpkin face you drew on at the beginning. You could also use markers, fabric paint, felt,etc to make the face.


I'd LOVE to see your finished pumpkins! Please send me a picture of your pumpkin creations!
This pattern is not to be used for resale! It is for personal use ONLY! Please respect this!
Subscribe to:
Posts (Atom)